Patio pointing is the process of filling and finishing the mortar joints between paving units, whether that's brick, stone flags, concrete blocks, or setts. When those joints crack, crumble, or go missing entirely, water gets in, weeds take hold, and the whole surface starts to shift. Repointing renews the external part of mortar joints in masonry because weathering and decay create voids that allow undesirable water entry water gets in. Pointing fixes that by renewing the material packed between each paver, sealing the gaps and stabilising the patio from the outside in. If you are wondering what is patio paint, it is a different surface coating used for appearance and protection, not the structural joint filling described here Pointing fixes that.
What Is Patio Pointing? Guide to Mortar Joints, Repair

What patio pointing actually means
The word "pointing" in masonry and paving simply refers to the material and technique used to fill the joints between individual units. On a patio, those units might be flagstones, clay pavers, concrete slabs, or natural stone setts. The mortar or jointing compound pressed between them is the pointing. When it's new or newly applied, it's called pointing. When you're renewing old, deteriorated joints, the job is called repointing.
It's worth knowing this isn't a niche term. Any covered outdoor space on a property, from a ground-level patio to a raised balcony or verandah, can include paved surfaces that need pointing. But pointing is most commonly discussed in the context of ground-level patios and pathways because that's where weather, foot traffic, and ground movement cause the most joint deterioration. If you're comparing a patio to a porch or courtyard, the same pointing principles apply to any of those spaces once there's a paved surface with mortar joints.
Pointing vs grouting vs sealant vs tuckpointing: what's the difference?
These terms get muddled constantly, so here's a plain-English breakdown.
| Term | What it means in practice | When you'd use it |
|---|---|---|
| Pointing | Pressing mortar or jointing compound firmly into paving joints by hand or tool | New patio installations or repairing isolated failed joints |
| Repointing | Removing the outer layer of old, failed mortar and replacing it with new material | When existing joints are cracked, hollow, or missing |
| Tuckpointing | Using two contrasting mortar colours in the same joint: one to fill the bulk, one thin contrasting line to give the impression of very fine joints | Decorative masonry restoration; less common on patios |
| Grouting / wet grouting | Pouring a wetter, slurry-consistency mortar mix across the surface so it flows into joints, then washing off the excess | Large areas of stone or sett paving where hand-pointing would be slow |
| Sealant / sealer | A liquid coating applied over the surface and joints to reduce water absorption and protect colour | After pointing is done, as a protective topcoat, not a substitute for pointing |
The key distinction to hold onto is that pointing is structural gap-filling, while sealing is surface protection. Sealing over failed joints will not fix them. It may actually trap moisture and make things worse. Similarly, grouting and pointing are both ways to fill joints, but grouting uses a runny slurry that flows in, while pointing uses a stiffer mix that's pressed in manually. Each method suits different paving types and conditions.
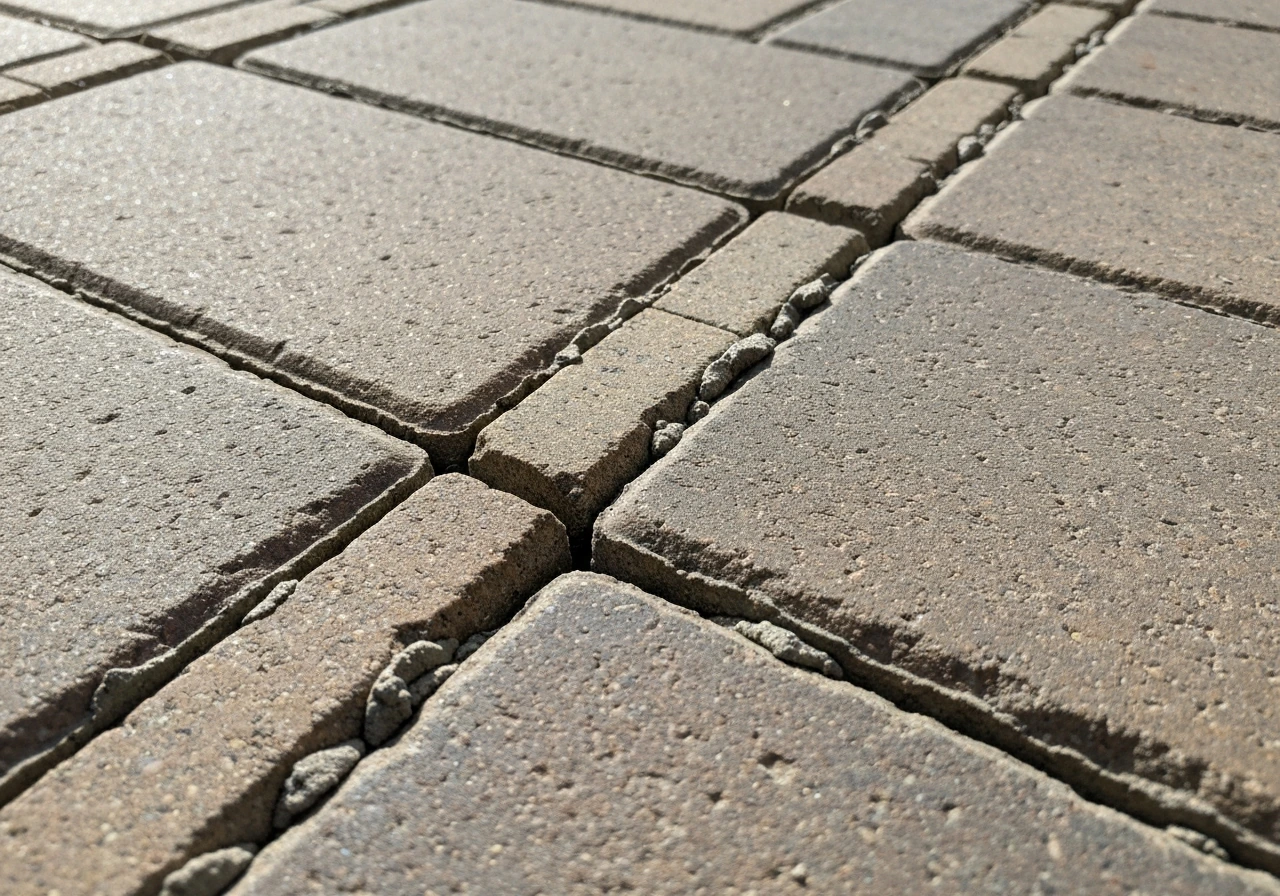
Signs your patio joints are failing and need repointing
You don't need a professional inspection to spot failing pointing. Walk across your patio slowly and look closely at the joints between pavers. Here's what bad pointing looks like:
- Crumbling or powdery mortar that you can scratch out with a finger or key
- Visible gaps or voids where mortar has fallen out entirely, especially deeper than about 10 mm
- Cracks running along the joint line, sometimes following the full length of a course
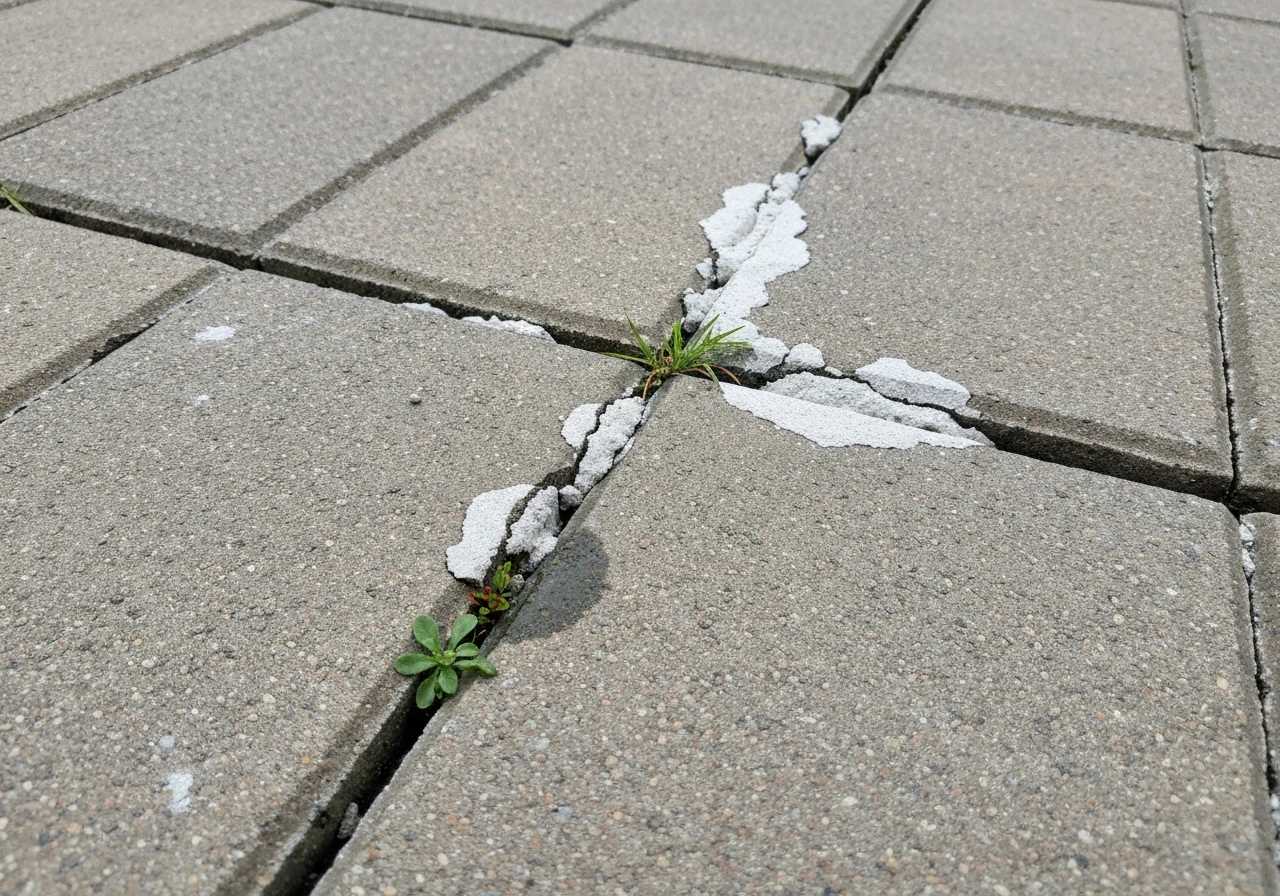
- Weeds or moss growing up through the joints (organic material has colonised the gap)
- Pavers that rock slightly underfoot because the joint no longer locks them in place
- Water pooling in low spots after rain, often caused by sunken pavers that shifted once joint material failed
- Efflorescence (white powdery salt deposits) on the surface near joints, which signals water is moving through the mortar and evaporating
- Damp patches appearing on adjacent walls or structures shortly after rainfall
A useful rule of thumb from masonry guidance: if mortar loss exceeds about a quarter of an inch (6 mm) in depth, or if you can rake out loose material easily to 10 mm or more, repointing is overdue. The longer you leave it, the more water penetrates beneath the paving bed, which accelerates frost damage and undermines the sub-base.
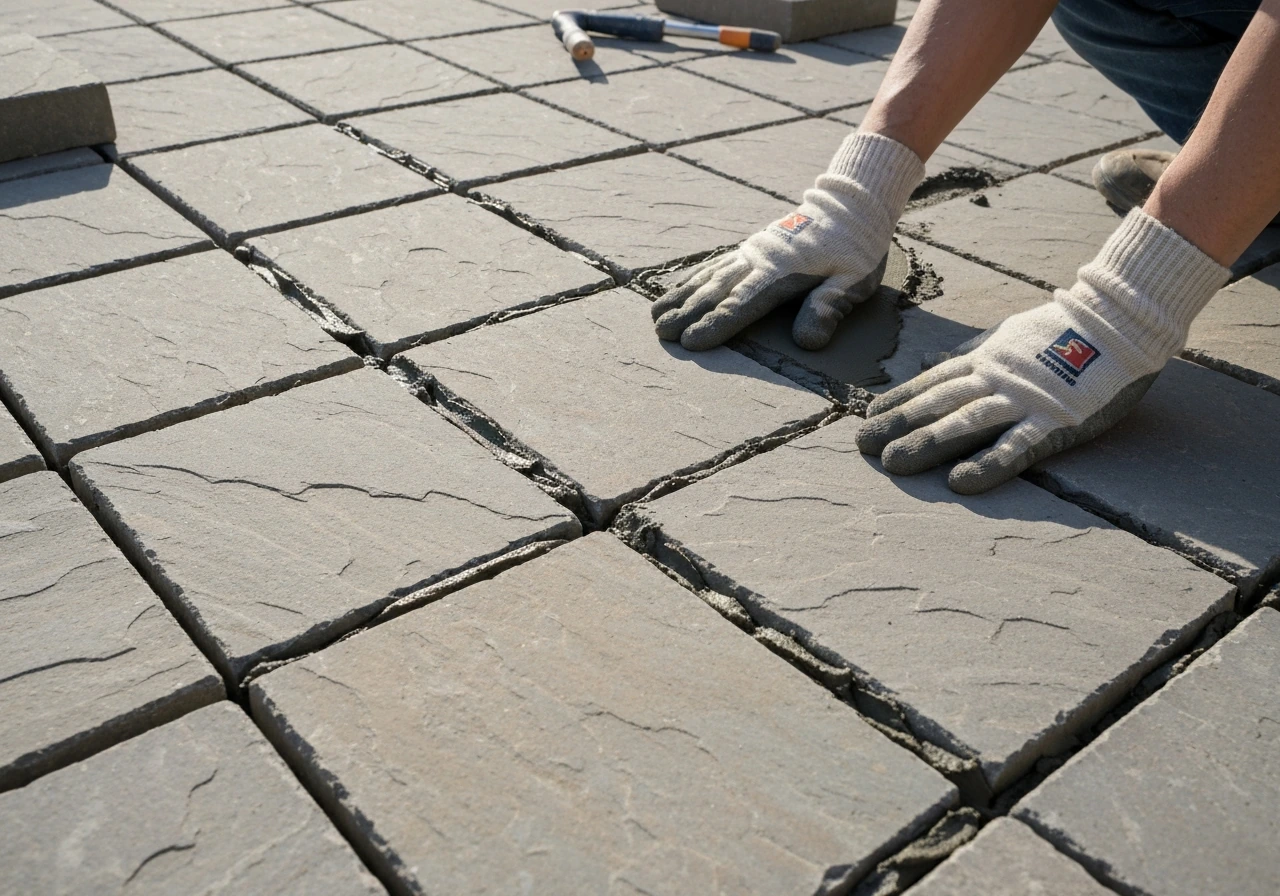
How patio pointing is done, step by step
The process is the same whether you're doing a small patch repair or reworking an entire patio. What changes is scale and material choice. Here's the practical sequence.
Step 1: Rake out the old mortar
Use a plugging chisel, angle grinder with a mortar rake attachment, or a dedicated joint raker to remove loose and failing mortar. For standard paving joints, aim to rake back at least 10 mm deep, and ideally 15 to 20 mm for a good mechanical key. For wider masonry joints, the general guidance is to remove material to a depth of at least twice the joint width. Don't just scrape the surface and point over it. New mortar won't bond properly to crumbling old material, and the repair will fail within a season.
Step 2: Clean the joints and pre-wet the surface
Brush out all loose debris with a stiff brush and blow out dust if you have a compressor. Then dampen the joints and surrounding paving with water before applying new mortar. This step is critical. If you press mortar into a bone-dry joint, the stone or brick will suck moisture out of the mix too quickly, preventing proper curing and causing the repair to shrink and crack. Pre-wetting also reduces the risk of mortar staining the paving face, especially on porous natural stone. Don't saturate the surface to the point of standing water, just damp.
Step 3: Mix and apply the pointing material
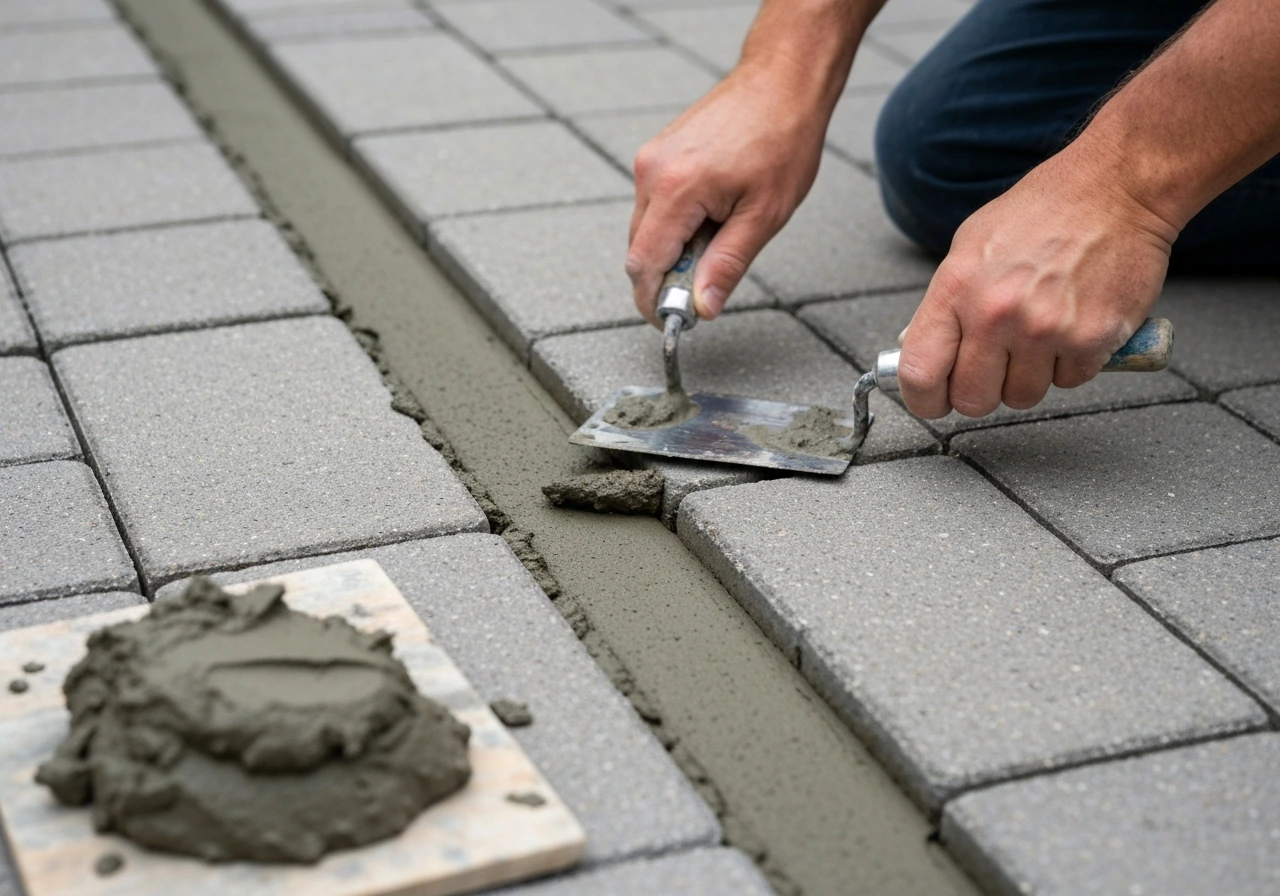
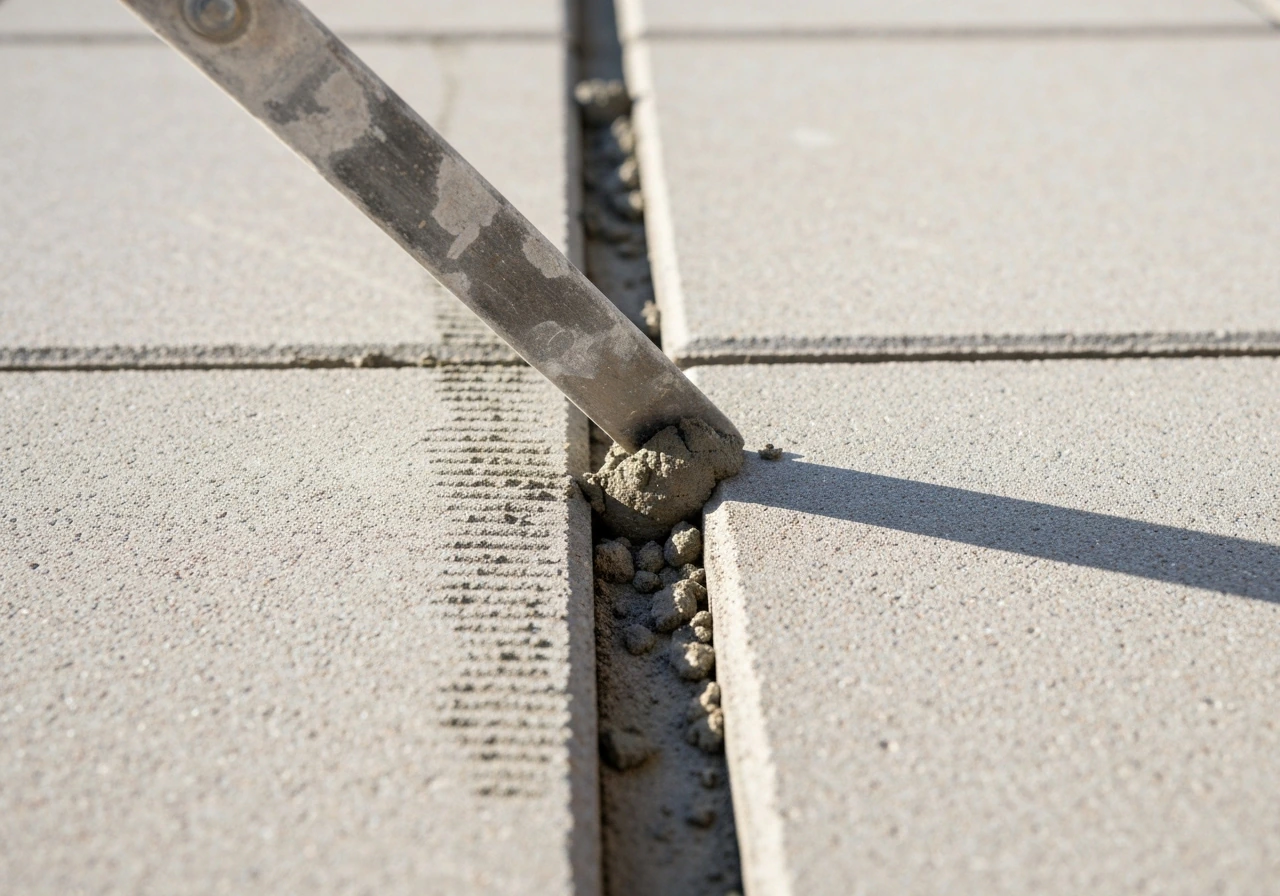
There are three main approaches, and the right one depends on your paving type and skill level. Traditional hand pointing uses a stiff mortar mix (more on ratios below) applied with a pointing trowel or a pointing gun, pressing the mix firmly into the joint to full depth. Dry mix pointing involves sweeping a dry or barely-damp sand and cement blend across the surface and brushing it into joints, relying on ambient moisture to hydrate the cement gradually. This method is faster but more prone to failure if the mix isn't well formulated or if rain hits before it sets. Polymeric jointing sand is a modern dry-sweep alternative where fine sand is pre-blended with water-activated polymers. You sweep it in dry, blow off the excess from the paving face, then mist it lightly with water two or three times to activate the binders.
Step 4: Pack, profile, and finish
For hand-pointed mortar, pack the joint in layers if it's deep, tamping each layer down before adding more. A jointing iron or rounded stick dragged along the joint creates a slightly recessed, tooled finish that improves water shedding. A weathered profile (sloped so the outer face sheds water away from the joint) offers good weatherproofing on exposed patios. Flush joints look tidy but collect slightly more water. Avoid a raised or proud joint profile on outdoor paving as it catches water and debris.
Step 5: Clean up and cure
Wipe mortar smears from the paving face while still fresh using a damp sponge, working carefully to avoid pulling material out of the joints. Once pointing is done, protect the work from rain for at least 24 hours and from frost for 48 to 72 hours. Don't rush this. Mortar that gets rained on before it sets washes out or develops a weak surface crust. In warm, dry conditions, lightly mist cured joints over the first two or three days to slow drying and reduce shrinkage cracking.
Choosing the right mortar for your patio type
Getting the mortar match right matters more than most people realise. Using a mortar that's stronger than the surrounding masonry or paving units puts stress at the edges of each paver, leading to spalling or cracking at the paver face rather than through the joint, which is exactly what you don't want. The joint is designed to be the sacrificial element.
| Patio type | Recommended pointing material | Mix guidance |
|---|---|---|
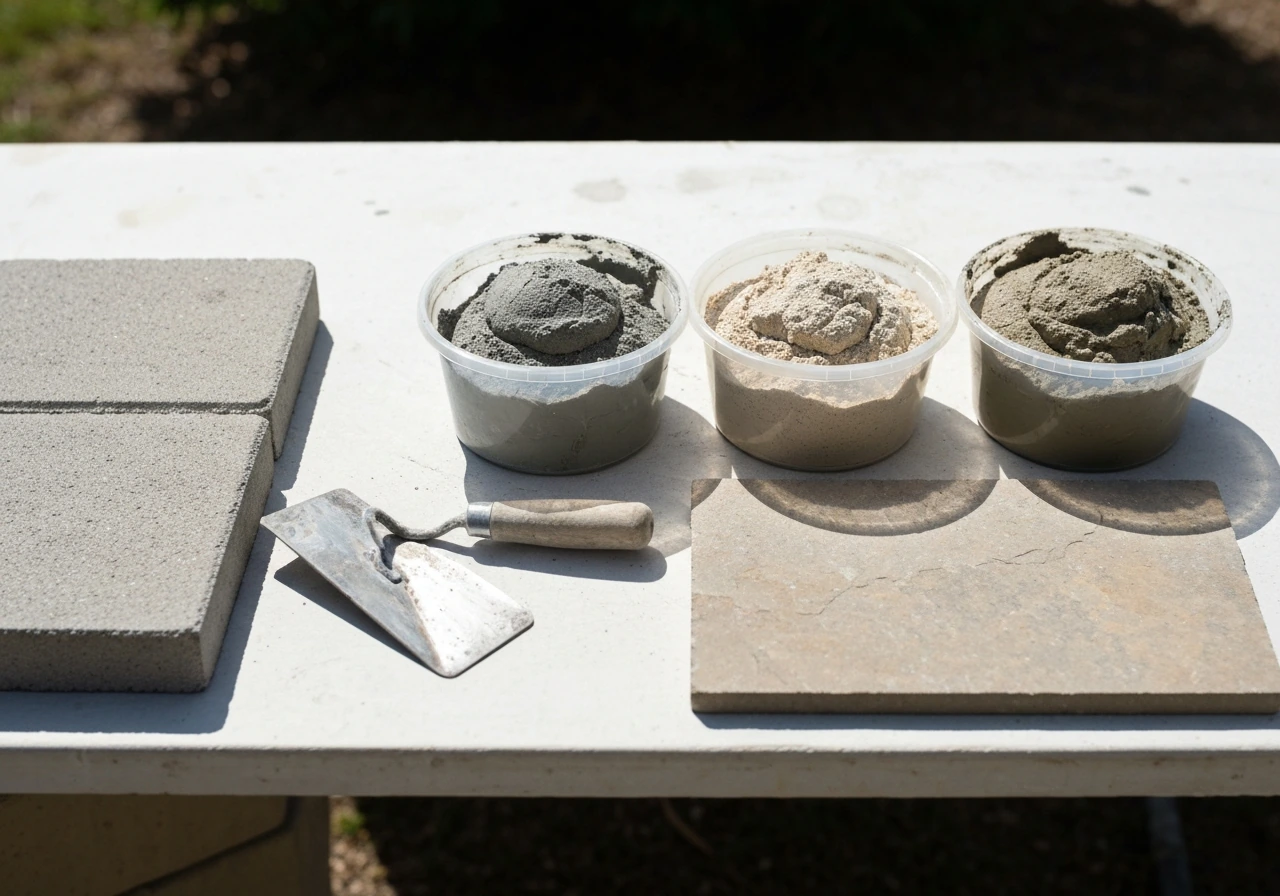
| Modern concrete or clay pavers, brick | Ordinary Portland cement mortar | Roughly 3 parts sharp sand to 1 part cement for standard work |
| Natural stone flags (sandstone, limestone) | Lime-based or weak cement mix | 1 part cement to 4-5 parts sand, or a hydraulic lime blend to avoid staining porous stone |
| Period or heritage paving | Pure lime or hydraulic lime mortar | Approximately 1 part hydraulic lime to 2.5-3 parts sand; avoid Portland cement on old soft stone |
| Concrete block paving (flexible lay) | Polymeric jointing sand | No mixing needed; sweep dry, activate with water misting per manufacturer instructions |
| Granite or hard stone setts (rigid bed) | Semi-dry cement mortar or jointing compound | 3:1 sand/cement, packed firmly by hand or with a float |
The principle from preservation guidance is worth repeating for natural stone especially: the pointing mortar should always be softer and more flexible than the masonry unit itself. This ensures any movement causes the mortar to crack and crumble, not the paver. Lime mortars are more breathable and elastic than Portland cement, which is why they're preferred for porous or historic stone. Portland cement on soft sandstone or old limestone is a common DIY mistake that causes long-term surface damage.
If you're not sure what type of stone you have or what the original mortar was made from, err on the softer side. A slightly weaker joint that needs redoing in 10 years is better than one that damages irreplaceable stone in five.
DIY or hire a pro?
For most homeowners, a modest patio repointing job is genuinely achievable as a DIY task. The techniques aren't complex, the materials are widely available, and a small patio can be done in a weekend. The honest question is whether the scale, the paving type, or the extent of damage pushes it out of DIY territory.
When DIY makes sense
- The damaged area is limited, say under 10 to 15 square metres
- The paving is concrete block, standard clay brick, or modern concrete flags (forgiving materials)
- The joints are surface-failed but the sub-base is level and stable
- You're using a pre-mixed jointing compound or polymeric sand rather than mixing from scratch
- Weather conditions are cooperative: no rain forecast for 48 hours, temperature above 5°C (41°F)
When to call a professional
- The paving is natural stone, especially porous types like sandstone or limestone, where mortar choice mistakes cause lasting damage
- The joint failure is widespread and the sub-base has clearly shifted or sunk
- The patio is large (over 20 to 30 sq m) and time or physical effort is a real constraint
- You need to match a specific mortar colour, texture, or profile for heritage or aesthetic reasons
- Damp is tracking through to an adjacent wall or structure, suggesting deeper drainage or structural issues
What it typically costs
In the UK, professional patio repointing typically runs around £10 to £20 per square metre for standard work, though brickwork repointing on walls and structures costs more, often £50 to £60 per square metre including labour and cleanup. In the US, masonry repointing generally runs from around $8 to $25 per square foot for typical projects, with specialised historic or difficult work reaching up to $35 per square foot. DIY material costs are a fraction of that: a bag of ready-mix pointing compound or a bucket of polymeric sand covers a significant area for a few pounds or dollars. The real DIY saving is labour.
What good pointing actually does for your patio long-term
Well-pointed joints do several things at once. They lock pavers in place so the surface stays level underfoot. They shed water off and away from the sub-base, which is the main reason patios heave in freeze-thaw climates. And they deny weeds, moss, and ants the loose, open gaps they need to colonise.
Polymeric jointing sand is particularly effective at weed and insect suppression because the polymer binders create a semi-rigid, compacted joint that's difficult for seeds to germinate in or ants to excavate. Traditional cement mortar, when properly applied and cured, does the same job but is more rigid and can crack under significant paving movement.
A well-pointed patio should last 10 to 20 years before needing attention, depending on climate, foot traffic, and whether the sub-base is stable. Checking joints every two or three years and catching small cracks before they open up is far easier than reworking an entire surface. Once a year, sweep the patio and look for any joint sections that sound hollow when you tap them with a knuckle. Hollow spots mean the mortar has debonded and will fail soon. If you are wondering what are patio chips and how they relate to failing joints, hollow spots are one sign to watch for patio repointing.
One thing pointing won't fix is poor drainage. If your patio is sloped toward the house or sits in a bowl that collects water, repointing will slow the damage but not solve the underlying problem. Sealing the surface after pointing can add a layer of water resistance and help protect joint colour, but as noted, sealing over failed joints just delays the same failure. Point first, seal second, and only if the paving type benefits from it. For a patio steak, the best cut is usually a marbled ribeye or a strip steak because they stay tender and cook well on a hot grill what cut of meat is a patio steak.
If you're also thinking about other patio surface treatments, materials like patio paint and outdoor rugs interact with pointing in different ways. An outdoor patio rug can add comfort and style, but it helps to address any joint problems like pointing before you lay one down outdoor rugs. Paint applied over an uneven, failed surface will crack at the joint lines. A rug placed over a sunken or rocking paver will show the unevenness quickly. Getting the pointing right is the foundation everything else sits on, literally.
FAQ
Is patio pointing the same as grouting or joint sealing?
No. Pointing (or repointing) is structural gap-filling using a pressed mortar or jointing compound. Sealing is a surface coating, it should not be used to fix failing joints, and it can trap moisture if the joints are already broken. Grouting is a slurry method that flows in, it can suit some paving setups but it is not the same technique as traditional pointing.
Can I apply polymeric jointing sand over old, crumbling mortar joints?
Usually you should not. Polymeric sand needs a clean, stable joint. If you leave loose, powdery mortar behind, the joint can fail quickly, and polymers may not bond properly. Remove all failing material back to sound substrate, then install polymeric sand to the manufacturer’s misting and setting timeline.
How do I decide between flush, raked, and weathered pointing finishes?
Choose based on water shedding. Weathered (sloped) joints tend to shed water away from the joint face on exposed patios. Raked finishes can help direct surface water, while flush joints often hold slightly more moisture. Raised or proud joints are more likely to collect debris and accelerate wear.
What happens if I don’t pre-wet the joints before applying mortar?
Dry joints can pull moisture out of the mortar too fast, causing poor curing and shrinkage, which leads to cracks or debonding. Pre-dampen the joints and surrounding paving, but avoid puddles, so the mortar cures with the right moisture balance and stains are minimized on porous stone.
How long should I keep traffic off the patio after pointing?
Plan to protect the work from rain and foot traffic for at least 24 hours, and avoid frost exposure for longer (48 to 72 hours) depending on weather. Mortar can look set earlier than it actually reaches strength, so keeping traffic off early prevents joint movement that can crack the fresh mortar.
Do I need to point again if my patio has hairline cracks in the mortar?
Not always. Small surface cracking can be cosmetic if the joints are still bonded and sound when tapped. Repointing is typically needed when you can rake out material easily, when depth loss is significant, or when hollow sounds indicate debonding beneath the paving.
Is it okay to use a stronger mortar than the surrounding pavers to make the joint last?
Avoid it. A joint mortar that is harder than the units can shift the stress to the edge of the pavers, causing chips or cracking at the paver face. The joint should act as the sacrificial element, and for natural or historic stone, a softer, more flexible mortar is usually the better match.
What’s the safest approach for natural stone if I don’t know the original mortar type?
Err on the softer and more breathable side. If you cannot identify the existing mortar, lime-based mortars are commonly safer for porous or historic stone because they are more elastic and compatible with movement, reducing the risk of damage caused by rigid Portland cement on softer substrates.
Will pointing fix a patio that floods or slopes toward the house?
Pointing slows water intrusion but it will not correct underlying drainage problems. If water pools or the patio is pitched incorrectly, the sub-base still gets saturated and can heave in freeze-thaw cycles. Address drainage, slope, and clearance first, then consider pointing and optional sealing.
How can I tell if a joint problem is coming from the sub-base, not just the mortar?
Look for rocking pavers, widespread hollow-sounding areas, and movement that continues even after repointing. If multiple adjacent joints fail at once or you notice differential settlement, the sub-base may be unstable or poorly compacted, and pointing alone may not hold the surface level.
Can sealing be applied after pointing, and is there a correct order?
If the paving type benefits from it, seal after pointing and curing. Do not seal failed joints, sealing can delay drying and trap moisture. Allow full cure time first, then apply sealing only once the joints are firm and the surface is clean and dry.
Is DIY repointing appropriate if the patio is large or uses unusual pavers?
It may still be DIY, but unusual paving, complex patterns, or heavy deterioration can push it out of DIY territory. If you are dealing with very deep joint loss, mixed paver types, or a wide area of debonding, a professional can help match mortar chemistry and prevent repeat failure.
What Cut of Meat Is a Patio Steak? Common Options
“Patio steak” usually means a casual name for grillable cuts like flank or skirt; learn options, choosing, and doneness.